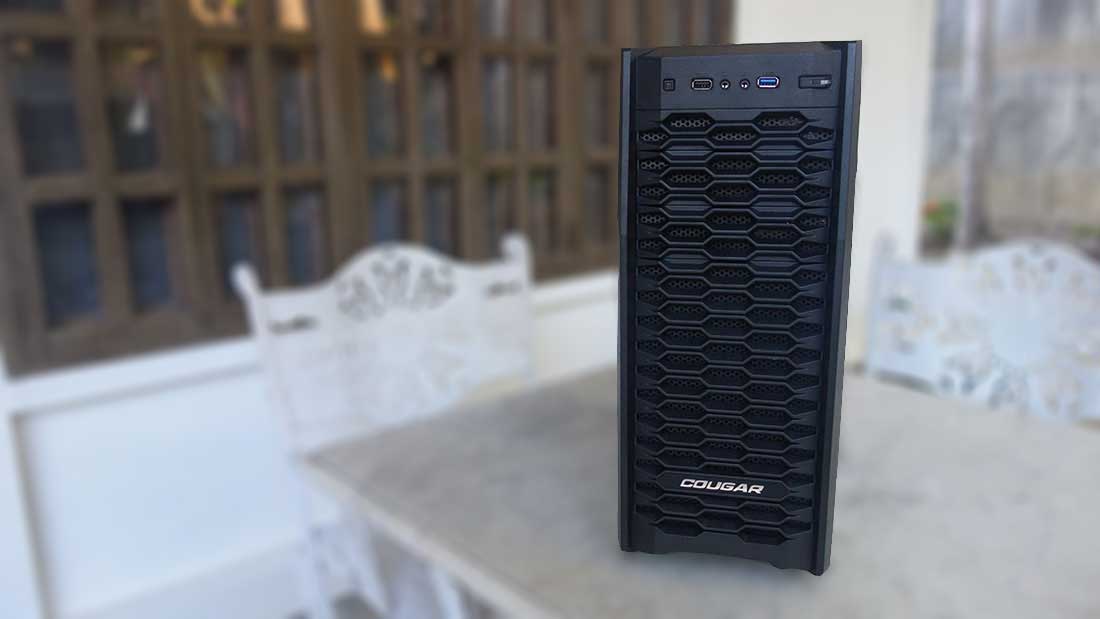
Many things come to mind when one starts planning out a new rig, not the least of which is choosing a new computer chassis (or case). And when deciding on one of the plethora of available chassis options there are a lot of variables to consider including size, graphics card clearance, cable management features, tool-less drive bays, cooling provisions, and especially price, among other things. This time we got to check out one of Cougar’s latest mid-tower cases – the MX300 – and build a new rig around it.
The Cougar MX300 is the second and latest model of the company’s new MX mid-tower case series. Dubbed as the MX line’s “rugged” gaming case, the MX300 features a completely black exterior with a mixture of aluminum and hard plastic components. It’s a fairly small case measuring only 195mm wide, 450mm high, and 490mm deep. For comparison, Cougar’s higher-end mid-tower Challenger series case measures 268mm, 514mm, and 523mm, respectively. In spite of its smaller size though, we found that the MX300 is still a packed with space and features to accommodate a wide range of builds.
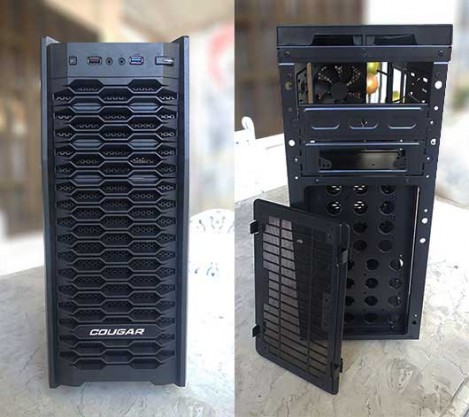
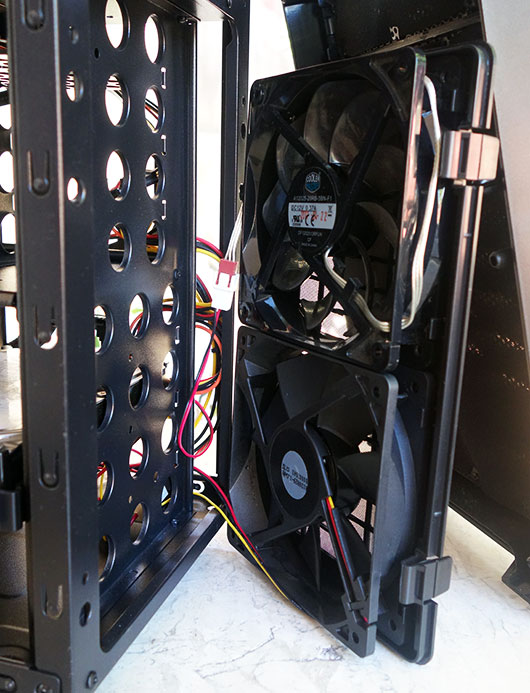
Most of the front of the case features a prominent honeycomb design with two removable sections for installing 5.25-inch and/or 3.5-inch drives (using a replacement section to accommodate the smaller drive). The top area of the of the front side of the features the case’s header panel with the power button, reset button, HDD LED, one USB 3.0 port, one USB 2.0 port, and 3.5mm headphone and microphone jacks. Removing the front panel of the MX300 reveals one of our favorite features of this case – the tool-less cooling fan assembly which comprises of a filtered frame where you can attach up to two 120mm case fans without using any tools or screws. The bracket itself easily clips onto the front interior of the case. Additionally, the inside of the front panel is also filtered; which will contribute greatly towards keeping the inside of the rig clean from dust.
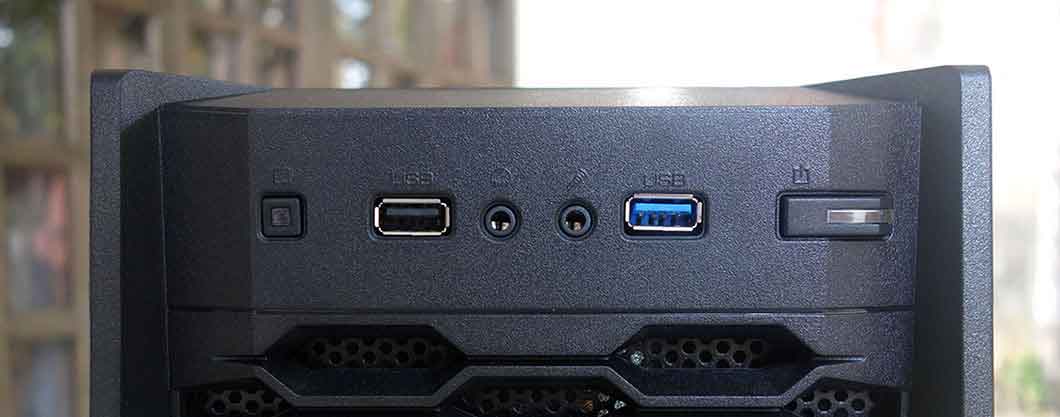
From Left to Right: Reset Button, USB2.0 Port, 3.5mm Headphone Jack, 3.5mm Microphone Jack, USB3.0 Port, Power Button
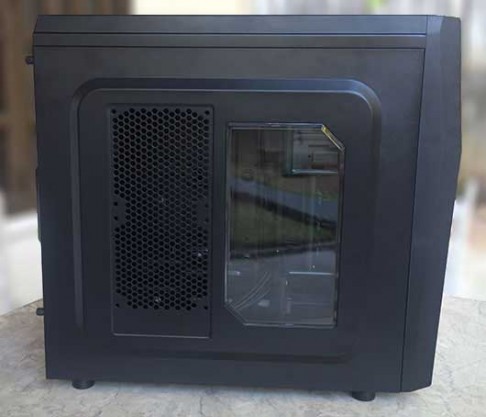
The left side of the MX300 features a slightly protruding area (to provide more clearance for third-party CPU coolers up to 165mm tall) that has a meshed opening near the rear end for placing up to two 120mm case fans and a clear window towards the front to see inside the rig. Additionally, unlike the fans in front of the case, you’ll need to use screws and tools to install fans here. The opening is also unfiltered so it would not be ideal to install intake fans in this opening as it would easily suck dust into the interior of the case. It would have been preferable to install a full-sized window here instead of the unfiltered mesh opening. The right side of the case features the same protruding area although without the window and opening. The protruding area here provides extra clearance for cable management.
The rear of the case is where you’ll find the opening for the bottom-mounted power supply, the seven PCI expansion slots, the motherboard I/O opening, the included 120mm rear case fan, and a pair of grommeted holes for routing liquid cooling tubing from inside the case to an exterior radiator. The expansion slot covers are vented which, according to Cougar, allows for better airflow. There’s also a plastic removable cover on the right of the expansion slots to conceal the panel where the expansion card support screws are installed. Having the panel on the exterior of the case makes it easier to install or remove expansion cards and allows more room inside the case.
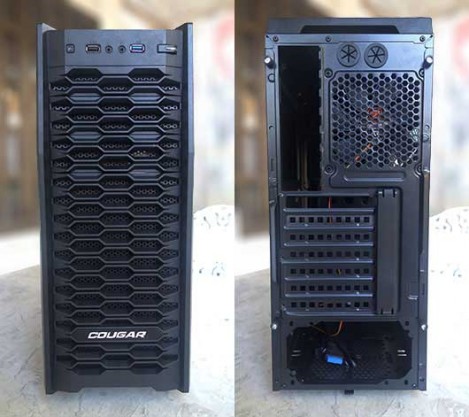
The top panel of the MX300 features another meshed opening as well as a large textured panel with the Cougar logo. The top panel is removable to allow access to the frame where you can install of up to two 120mm or 140mm case fans. Cougar has kindly included a magnetic fine mesh filter that attaches to the frame which makes the top area an ideal area to install intake fans. Although it isn’t intended for it, a 240mm radiator can also be installed on top of the case but you’ll have to use it without the top panel as there isn’t enough clearance below the frame to fit both the radiator block and radiator fans so you’ll have to put either of those above the frame instead. Lastly, the bottom of the case features half-inch hard plastic case feet as well as a removable PSU fan filter.
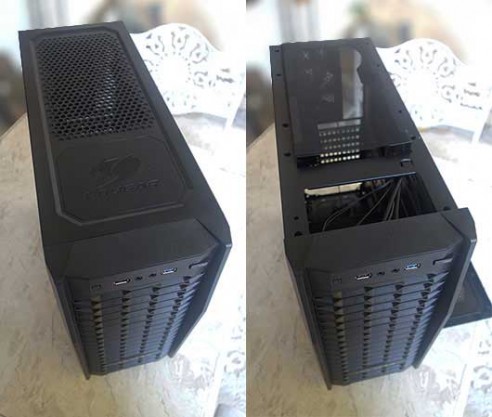
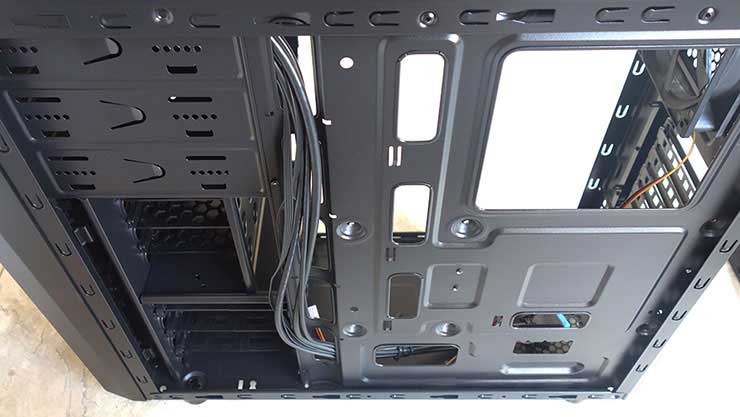
The inside of the case is painted completely black and features the case’s motherboard tray and its array of drive cages. The MX300 supports full ATX, micro-ATX, and even mini-ITX motherboards. Cougar has built-in in nine threaded standoffs on to the motherboard tray for easy installation of full ATX and ITX boards and has included three extra brass standoffs for those with mATX boards. The motherboard tray features a few cutouts for easy installation or removal of third-party CPU coolers as well as routing thinner cables in between the motherboard and tray.
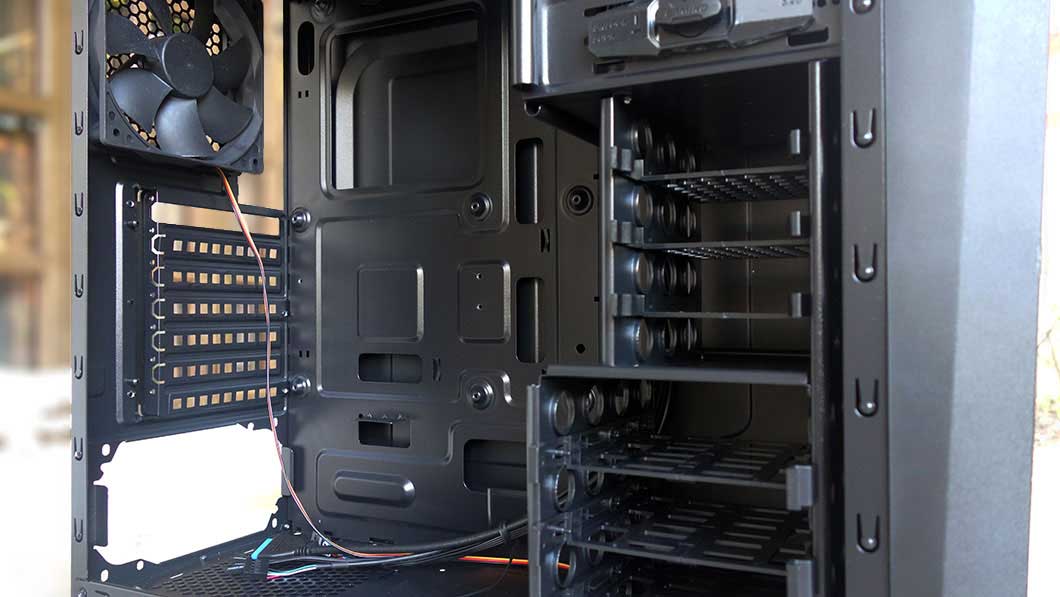
To the right of the motherboard tray, the MX300 features a total of three drive cages starting with a tool-less 5.25-inch drive cage which can fit either up to two 5.25mm drives or one bay can be converted to a 3.5-inch bay with the included adapter. Secondly, the side-loading 3.5-inch drive cage found at the bottom of the case can accommodate up to three 3.5-inch HDDs with three drive trays that feature and ingenious tool-less design – the drive tray is divided into two secured halves that can be expanded then a 3.5-inch HDD can be aligned with the tray’s pins before bringing the two halves together to secure the HDD.
Lastly, Cougar has ingeniously placed the side-loading 2.5mm/SSD drive bay in the middle area of the case between the larger cages which allows for larger video cards (up to 310mm long) to be installed in the MX300. Up to three 2.5mm drives can be easily installed with the three included trays but doesn’t feature the same tool-less design of the 3.5-inch drive trays which we found extremely unusual and is one of our few criticisms with the MX300.
Before I talk about putting together our test build as well as a few of the other internal features of the MX300, here’s the list of components we used for it:
- Motherboard – Asrock Z68 Extreme 4
- CPU — Intel i5-3550 3.30GHz w/ stock HSF
- Graphics Card — 2GB Palit GTX 760 JetStream
- RAM — 8GB (4GBx2) G.Skill RipjawsX 1600MHz DDR3 RAM
- PSU – Silverstone SST-ST50F-ES
- OS Drive — Western Digital Black2 Dual-drive (1258GB SSD + 1TB 5400rpm HDD)
- Storage Drive — 1TB WD Caviar Black (7200rpm) HDD
- Case Fans — Deep Cool (3pcs), Cooler Master (1pc), and Cougar (1pc)
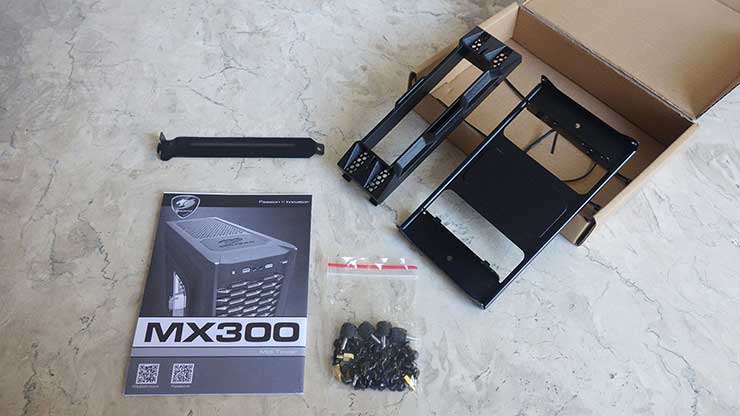
The MX300’s hardware kit which includes a 5.25″ to 3.5″ adapter, a 3.5″ drive front cover, an expansion slot cover, the manual, and a bag of screws and standoffs.
Putting together our test system with the MX300 was one of the easier builds we’ve done (and we’ve done a lot). First off, Cougar the built-in motherboard tray standoffs made it easy to mount our full ATX motherboard. After putting in the motherboard (with the CPU and RAM already attached) and the PSU, we started routing the large array of power cables from the PSU (our PSU isn’t modular).
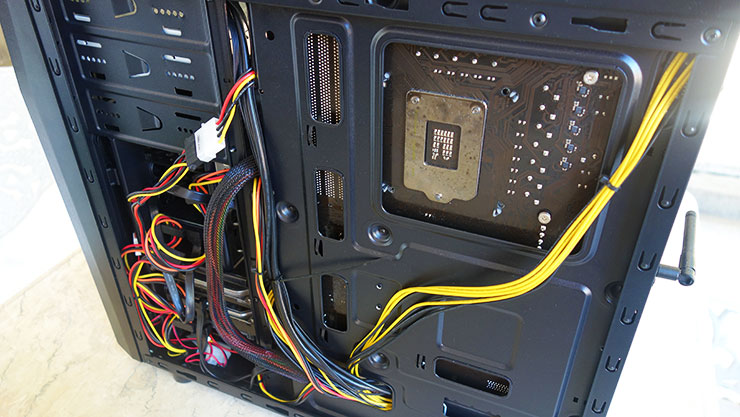
The MX300 has a cutout right beside the PSU and an array of openings to the right of the motherboard which lets you easily route your power cables to and from the back of the motherboard tray. This is where it gets a bit tricky though, as the MX300 only has around 10mm of clearance behind the motherboard tray which made it a bit difficult to stuff some of the cables back there specifically the fat ATX mother power cables but a clean build is still easily achievable.
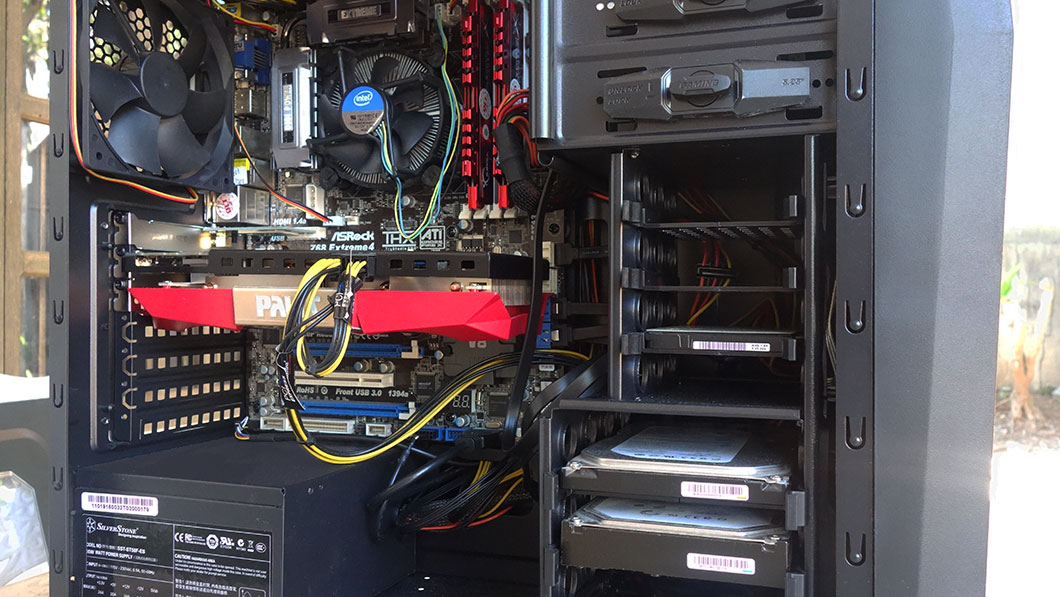
Additionally, even if there a cutout above the motherboard for the 8-pin 12v CPU power cable to route through, if your CPU power cable is long and thin enough, it can be routed behind the motherboard tray then into the cutout near the top of the tray and over the motherboard. But if you’re going to do this, you’re going to need to route it before mounting your motherboard because the clearance between the tray and the motherboard itself isn’t large enough to route the connector through the cutout and over the motherboard.
Installing our expansion cards, which included our video and WiFi card, was uneventful but we did almost literally hit a snag when we tried to install our storage drives. Attaching the drives to the included removable brackets was easy but once we started attaching the SATA cables we found that the cable connectors were a bit too long so the cable was slightly hitting the case wall where it was starting to bend downwards and right towards the motherboard. While this isn’t such a big issue depending on the SATA cables you use but it would be preferable to use SATA cables with right-angled connectors just to be safe.
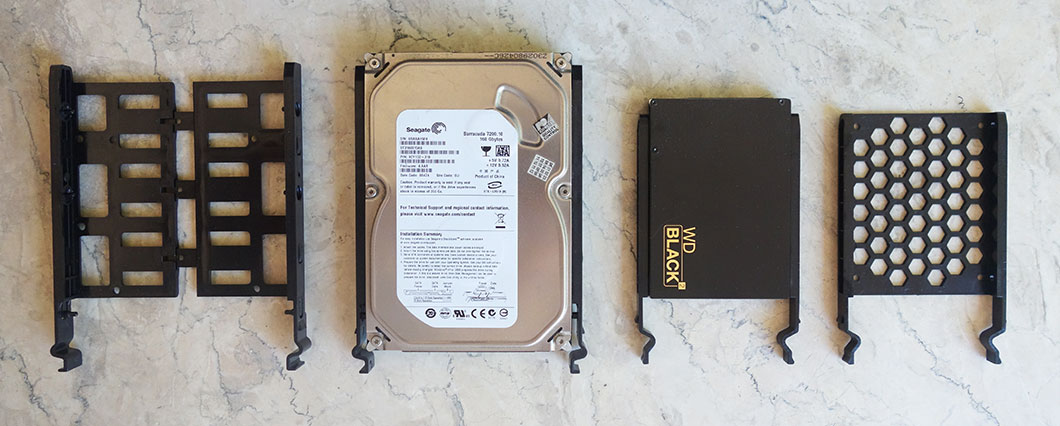
From left to right: expanded 3.5″ drive tray, occupied 3.5″ drive tray, 2.5″ drive tray with a WD Black2 Dual-Drive, and an empty 2.5″ drive tray.
In our test system, we put a total of 4 more extra fans to compliment the included Cougar rear case fan. We placed the 4 additional fans in the front fan assembly as well as in the slots on top of the case. Installation of the fans in front was extremely easy with the front fan assembly’s tool-less frame; we only needed to clip on the case fans onto the frame, route the fan power cables into the case, and attach the frame back into the case. The top fans were also fairly easy to install although we did need to screw each one on.
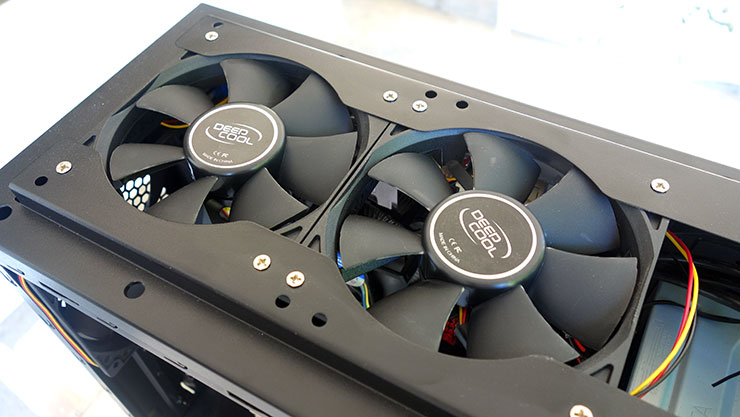
After assembly, we checked out the system’s temperature readings as well as the performance of each case fan and while the component temperatures were as expected — around 44-degrees Celsius for our CPU and 41-degrees for our GPU — we found that the included rear case fan was underperforming compared to the rest of the fans we put in and since the rear case fan was our only exhaust fan it led to hot air getting trapped inside the case so we recommend replacing that rear case fan with a stronger one and placing the stock one somewhere else in the case.
As for noise, with a total of 5 case fans plus the stock Intel CPU fan, the MX300 didn’t really isolate noise very well and was noticeably loud. It should be noted though that noise levels will depend on a number of variables including the number of fans as well as the specific fans used so your mileage may vary. Overall, building a system with, as well as temperature and noise performance of, the MX300 not only met our expectation but also exceeded some of them.
Conclusion
Conclusion
{rating}
The Cougar MX300 is a great case for those looking for a feature-packed chassis at a very affordable price. Although it has a few drawbacks and questionable design decisions, the rest of the design decisions that were made for the MX300 and the amount of features Cougar was able squeeze into this relatively slim and compact mid-tower chassis are definitely commendable. Building almost any rig in any range from low to high-end is possible with the MX300 and because of its very competitive price it’ll even allow you to put more money into the other components of your build. It’ll be difficult to find a case at this price point with as many features as the MX300 and we recommend it to any builder on a budget.


